

The easiest way to build a wearable ring stack is to anchor one statement piece and frame it with one or two thin bands. That single rule covers 90% of what makes a stack look intentional rather than accidental. Start there, then build outward.
Five quick ideas you can try right now:
- Anchor + two slim bands: A 4mm solitaire on your middle finger, flanked by two 1.5mm polished bands beneath it.
- Mixed metals, one dominant: Three rings in yellow gold with one white gold accent band for contrast without chaos.
- Midi moment: A thin band at the base of your index finger, a midi ring above the knuckle, nothing else on that hand.
- Signet pinky stack: A signet ring on your pinky with two whisper-thin bands stacked below it.
- Three-tone asymmetrical spread: Yellow gold on the index, rose gold on the middle, white gold on the ring finger — no finger holds more than one ring.
Two example stacks worth bookmarking: Statement solitaire on the middle finger + two 1.5mm hammered bands beneath — focal piece plus frame, reads considered. And: Pavé eternity band on the ring finger + plain 1mm band on the index + bare middle finger — the negative space does the work.
Jewelry experts at The Gem recommend starting with one strong anchor piece and framing it with thinner bands rather than pairing two heavy pieces together. Trinitycarter’s stackable ring designs are built around exactly that principle.
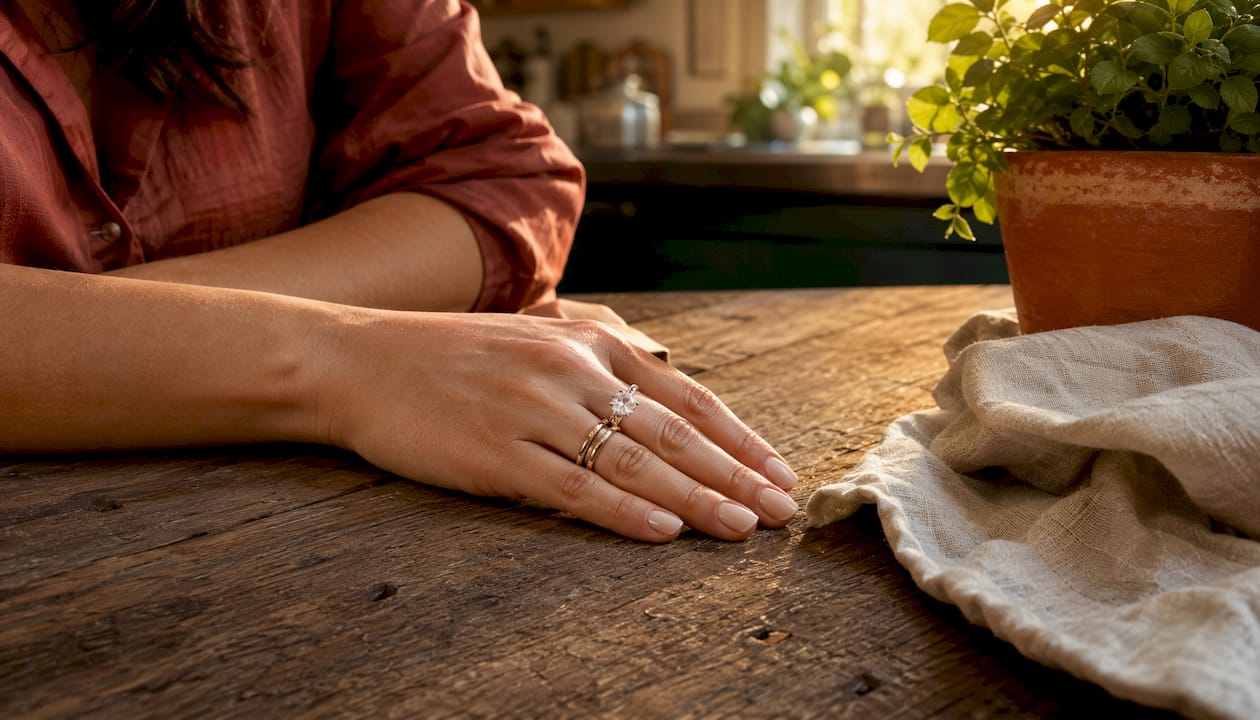
Table of Contents
- What are the best ring stacking ideas to try right now?
- Which ring types actually work for stacking?
- How to build a balanced ring stack, step by step
- Mixing metals, fit, and daily-wear practicalities
- What stylists say about building a stack over time
- Key Takeaways
- A perspective on what ring stacking is really about
- Trinitycarter’s stackable ring picks for your next stack
- Useful sources and further reading
What are the best ring stacking ideas to try right now?
These eight concepts range from minimal to maximalist. Each one names the look, tells you how to build it, and suggests where it fits in your life.
-
Minimalist thin-band stack. Two or three 1–1.5mm bands in the same metal on one finger. Wear them all on your ring finger for a clean, modern look that pairs with anything from jeans to a blazer. Start simple with two slim bands as the backbone, then add texture once the base feels balanced.
-
Modern mixed-metal stack. One yellow gold band, one white gold, one rose gold — all thin, all on the same finger. The trick is keeping widths consistent so the metals do the talking. Great for anyone who already owns rings in different metals and wants to wear them together without overthinking it.
-
Textured contrast stack. One hammered or twisted band next to one high-polish band. The surface difference creates visual depth without adding bulk. Vary widths slightly (a 3mm hammered band next to a 1mm smooth one) for the best result.
-
Vintage-inspired signet stack. A flat signet ring on the pinky or index finger, with one or two delicate bands stacked alongside it on the same finger or the adjacent one. The signet anchors the look; the thin bands soften it.
-
Knuckle-moment stack. A midi ring worn above the knuckle on the index or middle finger, with a standard band at the base. Keep everything else bare — this look needs negative space to land. Note that knuckle rings require careful sizing and are better for occasional wear than all-day use.
-
Pinky power stack. Two or three thin bands stacked only on the pinky. It reads unexpectedly chic and keeps your other fingers free for a single statement piece.
-
Engagement-ring framing stack. Your engagement ring as the anchor, with a pavé eternity band on one side and a plain metal band on the other. The goal is to frame the center stone, not compete with it. Contoured or nesting bands designed to follow the finger silhouette work best here.
-
Colorful gemstone pop. One neutral metal band, one ring with a colored stone (sapphire, turquoise, opal), one plain band. The gemstone ring is the focal point; the plain bands give it room. According to GIA’s ring stacking guide, colored gemstones representing birthstones add a layer of personal meaning to any stack.
Pro Tip: Photograph your hand from above before committing to a stack. What looks balanced in the mirror sometimes reads differently in a flat photo — which is how most people will see your rings on social media.

Which ring types actually work for stacking?
Not every ring in your collection is a natural team player. Here is what each type brings to a stack and where it can cause problems.
- Thin bands (1–2mm): The workhorses of any stack. Easy to layer, comfortable all day, and they pair with everything. Beginners should start here.
- Statement rings / solitaires: Strong anchors that set the tone for the whole stack. Pair with only quiet, thin bands — never two statement pieces side by side.
- Pavé and eternity bands: Add sparkle and texture. Vary widths (a 4mm anchor with 1–1.5mm supporting bands) and avoid pairing two eternity bands with mismatched stone spacing unless the contrast is deliberate.
- Signet rings: Flat profile makes them surprisingly stackable. Best on the pinky or index finger where they sit without crowding adjacent rings.
- Midi and knuckle rings: Visually striking but require precise sizing and can restrict joint movement. Better for photos or evenings than daily wear.
- Textured and hammered bands: Add dimension without gemstones. Alternate one textured ring with one smooth band so neither overwhelms the other.
For beginners, thin bands and contoured bands are the easiest entry point. Statement rings and knuckle rings both need sizing attention before you commit to wearing them in a stack.
How to build a balanced ring stack, step by step
Follow this sequence and you will avoid the two most common mistakes: too much weight on one finger, and rings that spin or pinch.
- Choose your anchor. Pick one ring that will be the focal point — a solitaire, a signet, a textured band with presence. Everything else supports it.
- Pick supporting bands. Choose one or two thin bands that vary in texture or finish from the anchor. Smooth bands next to a hammered anchor, for example.
- Decide on finger distribution. Distribute rings across two or three fingers when four or more rings would feel heavy on one. Leave at least one finger bare for negative space.
- Try combinations and edit. Put everything on, step back, and remove the ring that feels like one too many. The stack that looks best usually has one fewer ring than you think it needs.
- Finalize fit and resize if needed. Fingers taper, so rings intended for the base sit differently than rings near the knuckle. Size inner rings larger and rings nearer the knuckle smaller by roughly half a size. Ask your jeweler for “sizing for position.”
Quick checklist before you finalize:
- Visual weight: does one finger look overloaded?
- Comfort: can you bend your fingers freely?
- Metal rule: is one metal dominant (roughly 60–70% of the stack)?
Pro Tip: “Sizing for position” is a routine jeweler service most people never ask for. If a ring spins constantly or feels tight only when your hand is warm, that is a fit issue, not a ring issue — a half-size adjustment fixes it.
Mixing metals, fit, and daily-wear practicalities
The dos and don’ts of styling
Do choose one dominant metal for the majority of your stack and use a second or third metal as an accent. Do use negative space — a bare finger between two stacked sections makes the whole hand read as composed rather than cluttered. Don’t place two heavy statement pieces on adjacent fingers; the visual weight competes and neither piece wins.
For fashion ring combinations that work across different outfits, a warm-metal dominant stack (yellow gold or rose gold) tends to photograph well and transitions easily from casual to dressed-up.
Sizing and fit
Fingers are wider at the base and narrower toward the tip, and they swell slightly in heat. Size your anchor ring for a comfortable fit at the base. If you are stacking two rings on one finger, the inner ring (closer to the hand) should be slightly larger than the outer one. Midi rings sized too loosely will migrate and bunch; too tight and they cut off circulation after an hour.
Care and maintenance
Clean stacked rings separately when possible — fine jewelry poses a choking hazard for young children, so store pieces in a closed box or drawer, not loose on a surface. Avoid wearing diamond rings stacked directly against other diamond rings; the stones will scratch each other over time. Remove your stack before swimming, applying lotion, or doing anything with your hands that involves impact. Store rings individually in a soft-lined box or in separate compartments to prevent scratching.
What stylists say about building a stack over time
The best stacks are not bought in one shopping session. Styling experts consistently recommend collecting rings over time so each piece carries meaning — the resulting stack feels personal and effortless in a way that a pre-packaged set rarely does.
The most considered stacks evolve by accumulation: start with an anchor piece that means something, then add rings tied to milestones, travels, or relationships. Avoid accidental accumulation — every addition should earn its place by contributing either contrast, texture, or meaning to the whole.
High-end designers have taken note of this approach. Rings engineered to nest — contoured bands that follow the finger silhouette — simplify the process and increase daily wearability. Trinitycarter’s design approach reflects this: pieces like the Multi Tone Trinity Interlinked Ring are built to function as a pre-composed stack, giving you the layered look without the guesswork of sourcing three separate rings that happen to sit well together.
The practical takeaway: start with one anchor piece you love, then add rings tied to specific moments. That approach produces a stack with a story, which is what makes it worth wearing every day.
Key Takeaways
A well-built ring stack starts with one anchor piece, uses thin bands for support, and leaves deliberate negative space so the hand reads as composed rather than crowded.
| Point | Details |
|---|---|
| Anchor first | Start with one statement ring and frame it with one or two thin bands, never two heavy pieces side by side. |
| Vary widths and textures | Pair an anchor with thinner supporting bands; alternate textured and smooth surfaces for depth. |
| Dominant metal rule | One metal should be dominant in the stack; use others as accents. |
| Size for position | Inner rings sit larger than outer rings; ask your jeweler for “sizing for position” to prevent spinning or pinching. |
| Trinitycarter picks | The Multi Tone Trinity Interlinked Ring, Triple Crystal Classique Ring, and Blossom Flowergram Ring each work as anchors or accent pieces in the stacks described above. |
A perspective on what ring stacking is really about
The conversation around ring stacking tends to focus on rules: dominant metals, width ratios, negative space. Those rules are real and worth knowing. But the more interesting question is why a stack works emotionally, not just visually.
A ring stack that looks effortless almost always has a history behind it. One ring was a gift, one was bought on a trip, one was inherited. The rules of composition matter because they give that collection a visual logic — but the rules are in service of the story, not the other way around.
What gets underestimated is how much the order of acquisition shapes the result. Buying a curated set of five rings at once produces a coordinated look, but it rarely produces a stack that feels like yours. The stacks that stop people mid-conversation are usually the ones built over years, where each ring has a reason for being there.
The practical implication: do not wait until you have “enough” rings to start stacking. Start with two. Let the stack grow the way a good wardrobe does — slowly, deliberately, with each addition earning its place.
Trinitycarter’s stackable ring picks for your next stack
Trinitycarter designs rings with stacking in mind — gold-plated, crystal-set, and feminine without being fussy. Three pieces worth building a stack around:
The Multi Tone Trinity Interlinked Ring functions as a pre-composed stack in a single piece: three interlinked bands in mixed metal tones that give you the layered look without sourcing three separate rings. Wear it alone on the middle finger or pair it with one slim band on an adjacent finger.
The Triple Crystal Classique Ring is a three-row pavé band that works as a statement anchor. Frame it with two 1mm plain bands on either side and the crystals do all the work.
The Blossom Flowergram Ring brings a floral focal point to any stack. Pair it on the index finger with a single thin gold band below it, and leave the middle finger bare. The Flowergram style guide has more pairing ideas if you want to take it further.
Browse the full Trinitycarter rings collection to find your anchor piece and build from there.
Useful sources and further reading
- GIA 4Cs: Ring Stacking Guide — authoritative overview of stack composition, finger placement, and gemstone pairing from the Gemological Institute of America.
- The Gem: Ring Stacking Rules That Actually Work — practical guidance on sizing for position, width ratios, and knuckle ring cautions.
- Juwels & Co: How to Stack Rings — The Complete Guide — detailed stylist rules on negative space, finger distribution, and daily-wear practicalities.
- Catbird: How to Stack Rings Like a Stylist — editorial advice on building a personal stack over time.
- South China Morning Post: How to Stack Rings Like a Pro — jeweler perspectives on nesting bands and designed-for-stacking pieces.
- Glamour: How to Wear Multiple Rings — fashion-forward starting advice for beginners.
- Trinitycarter Rings Collection — shop stackable ring picks including the Multi Tone Trinity Interlinked Ring, Triple Crystal Classique Ring, and Blossom Flowergram Ring.
- Trinitycarter: Jewelry Trends 2026 — current trend context for pairing ring stacks with broader jewelry looks.
