

Measure your wrist circumference just below the wrist bone with a flexible tape or a string against a ruler, then add an allowance based on fit. Add about 1/2" for a standard comfortable fit, less for a snug look, more if you want the bracelet loose or stacked. From there, style changes the math slightly. Use the chart and steps below to land on the right number the first time.
TL;DR:
- Most people should add about 3/4 to 1 inch to their wrist measurement for a comfortable daily fit, with more for a loose or stacked look.
- Measuring the wrist just below the wrist bone using a tape, string, or existing bracelet ensures the most accurate sizing.
- Bangle sizes should be based on knuckle circumference, not wrist size, while cuffs require only wrist measurement with a small allowance for adjustability.
- Adjustable bracelets and styles with extenders provide better flexibility when unsure of the exact size or measuring someone else.
- Wrist shape and the placement of the bracelet influence fit, making ease of movement and comfort test more reliable than precise measurements alone.
Table of Contents
- Bracelet Size Chart: Wrist Measurement to Bracelet Length
- How Do You Measure Your Wrist for a Bracelet?
- Does Bracelet Style Change How You Measure?
- How Much Extra Length Should You Add to Your Wrist Size?
- What Sizing Tools Help You Get an Accurate Measurement?
- What Are the Most Common Wrist-Measuring Mistakes?
- Trinity Carter’s Quick Cuff-Fit Method
- What Actually Matters Most When Sizing a Bracelet
- Find Bracelets Sized to Fit, Not Just to Guess
- Where to Double-Check Your Measurement
- Sources
Bracelet Size Chart: Wrist Measurement to Bracelet Length
Once you know your wrist circumference, the conversion to bracelet length is simple arithmetic, not guesswork. A 6" wrist typically requires a bracelet slightly larger than 6" for a snug fit, a bit larger for a comfortable everyday fit, and even more if you prefer a looser drape or plan to stack pieces.
Bracelets typically require a size increment over wrist circumference for snug, comfort, or loose fit; exact numbers vary by brand. Most women’s wrists tend to be smaller than most men’s wrists. Use brand-specific sizing guides for best fit.
How Do You Measure Your Wrist for a Bracelet?
You have three reliable options: a flexible tape measure, a strip of string or paper, or an existing bracelet you already know fits well. All three work. The tape is fastest, the string method is more forgiving if you don’t own a tape measure, and comparing an existing piece is the most accurate if you have a favorite that already fits right.
- Grab your tool. A soft fabric or vinyl tape measure works best. No tape? Use a strip of paper or string and a rigid ruler.
- Find the spot. Wrap the tape just below the wrist bone, the same spot a watch sits.
- Check the tension. It should sit flat against your skin, snug but not pulled tight. You should be able to slide one finger underneath comfortably, which is the same fit test watchmakers use for a proper strap.
- Mark and measure. If using string or paper, mark where it overlaps, lay it flat, and measure the length against your ruler in inches or centimeters, per wikiHow’s measurement method.
- For bangles, measure around your knuckles instead, with your thumb tucked against your palm. The bangle has to slide over your hand, so this number matters more than your actual wrist size.
- For open cuffs, wrist circumference is what counts, since cuffs don’t form a closed loop.
- To check an existing bracelet, lay it flat and measure the inner length when clasped, not the outer edge.
Pro Tip: Measure twice, at the same time of day you’d normally wear jewelry. Wrists can shift by a few millimeters between morning and evening.
Does Bracelet Style Change How You Measure?
Yes, and this is where most sizing mistakes happen. Bangles, cuffs, and chain bracelets each follow different rules, so your wrist measurement alone doesn’t tell the whole story.
- Bangles: Size off your knuckle circumference, not your wrist, since the piece must pass over your hand to reach your wrist. Round up to the nearest available inner diameter rather than down.
- Cuffs: These sit closer to the skin than closed bracelets, so wrist circumference is the right measurement. Open cuffs flex slightly, giving you a small margin, roughly 1/4", to adjust after the fact.
- Chain and link bracelets: Use standard comfort allowance from the chart above. Many chain styles include a small extender, which is worth using if you’re between sizes.
- Charm bracelets: Charms add weight and bulk, so size slightly looser than a plain chain to keep the piece from feeling tight as charms accumulate.
- Adjustable or bolo styles: These are the most forgiving option since the slide mechanism covers a range of wrist sizes. Still double-check the minimum and maximum size listed, since some adjustable designs don’t shrink small enough for narrower wrists.
How Much Extra Length Should You Add to Your Wrist Size?
The allowance you add on top of your raw wrist measurement is what actually determines comfort, and it depends entirely on how you like a bracelet to sit.
- Snug/tight: Add 1/4" to 1/2" (0.6 to 1.3 cm). The bracelet sits close, minimal movement.
- Comfort fit (most common): Add 3/4" to 1" (1.9 to 2.5 cm). This is the allowance most retailers recommend for everyday wear.
- Loose or stacked: Add 1.25" to 1.5" (3.2 to 3.8 cm) or more, especially if you’re layering multiple bracelets on one wrist.
A 6" wrist translates to roughly 6.25"–6.5" for snug, 6.75"–7" for comfort, and 7.25"–7.5" or higher for a loose, stacked look. If you’re unsure which category you fall into, comfort fit is the safest default for a single everyday piece.
What Sizing Tools Help You Get an Accurate Measurement?
A few practical aids take the guesswork out of measuring, especially when ordering online without trying anything on first.
- Printable rulers or sizing PDFs: Always print at 100% scale, never “fit to page,” or your measurements will be off. Most printer defaults shrink documents slightly to fit margins.
- Retailer sizing kits and video tutorials: Several retailers publish official wrist-sizing guides with step-by-step video walkthroughs, useful if you’re a visual learner.
- An existing bracelet: Lay a piece you already own flat, measure its inner length when clasped, and compare that number against the chart above.
What Are the Most Common Wrist-Measuring Mistakes?
Most sizing complaints trace back to a handful of repeatable errors, all easy to fix once you know what to look for.
- Measuring too loosely: A tape that sags gives you a bigger number than your real wrist size.
- Wrong spot: Measuring higher up the forearm instead of right below the wrist bone throws off the result.
- Bad knuckle posture for bangles: Spreading your fingers wide inflates the knuckle measurement; keep your thumb tucked in.
- Ignoring swelling: Hands and wrists swell slightly in heat or after exercise, so measure at your normal wearing time rather than right after a workout.
- Splitting the difference badly: If your number falls between two sizes, size up rather than down, or choose an adjustable or extender-equipped style.
Pro Tip: If you regularly notice swelling by afternoon, add an extra 1/8" to your comfort allowance so the bracelet doesn’t feel tight later in the day.
Trinity Carter’s Quick Cuff-Fit Method
Cuffs are the style people get wrong most often because they look adjustable but aren’t infinitely so. Trinity Carter’s guide on how to measure a cuff bracelet in 30 seconds walks through wrapping a strip of paper around your wrist at the exact spot the cuff will sit, then comparing that measurement against the opening width of the piece before you buy.
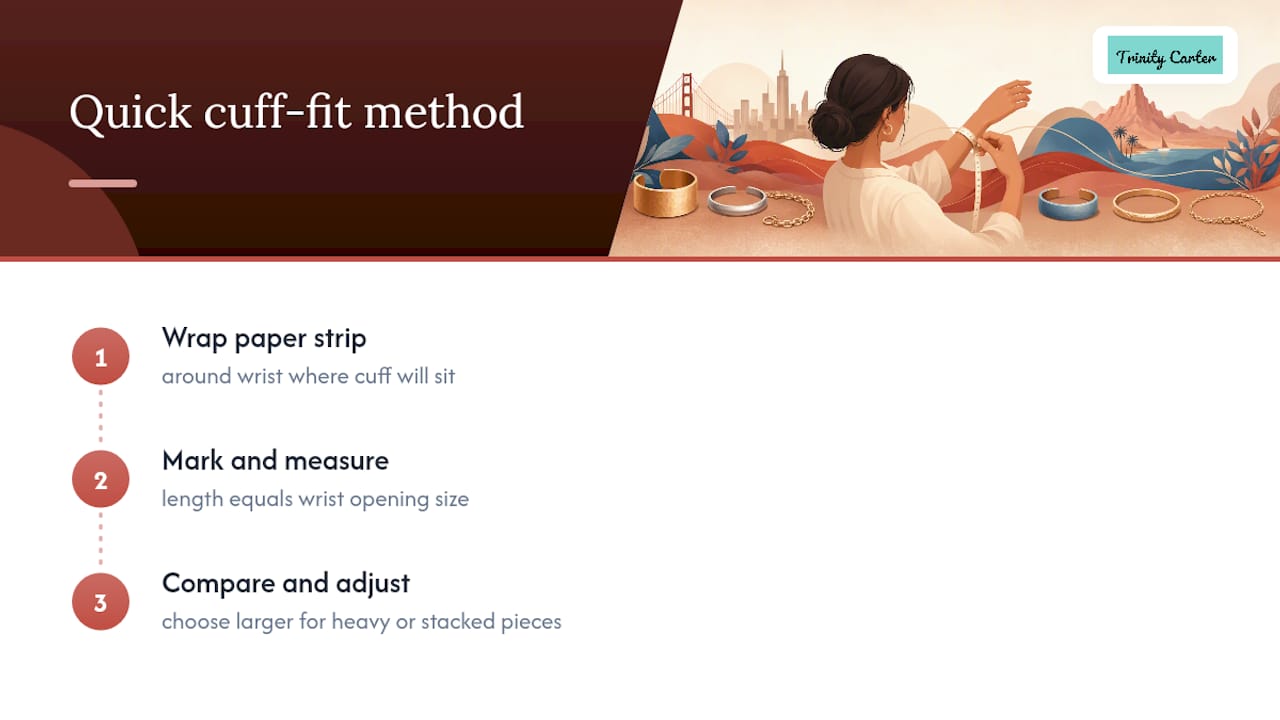
If you’re eyeing a cuff with a heavier motif or planning to stack several bracelets together, size up slightly. Heavier designs sit a little differently than a plain band, and stacked pieces need breathing room to avoid pinching. For chain-style pieces with more delicate detailing, the styling notes on wearing cuffs cover how proportion and wrist size affect the overall look, not just the fit.
What Actually Matters Most When Sizing a Bracelet
Most sizing guides treat this like a math problem: measure, add a number, done. The reality is messier. Wrist shape matters as much as circumference. Two people with identical 6" measurements can need different bracelet lengths if one has a flatter, boxier wrist and the other a rounder one. The chart gets you close. Your own comfort test, sliding one finger underneath, closes the gap.
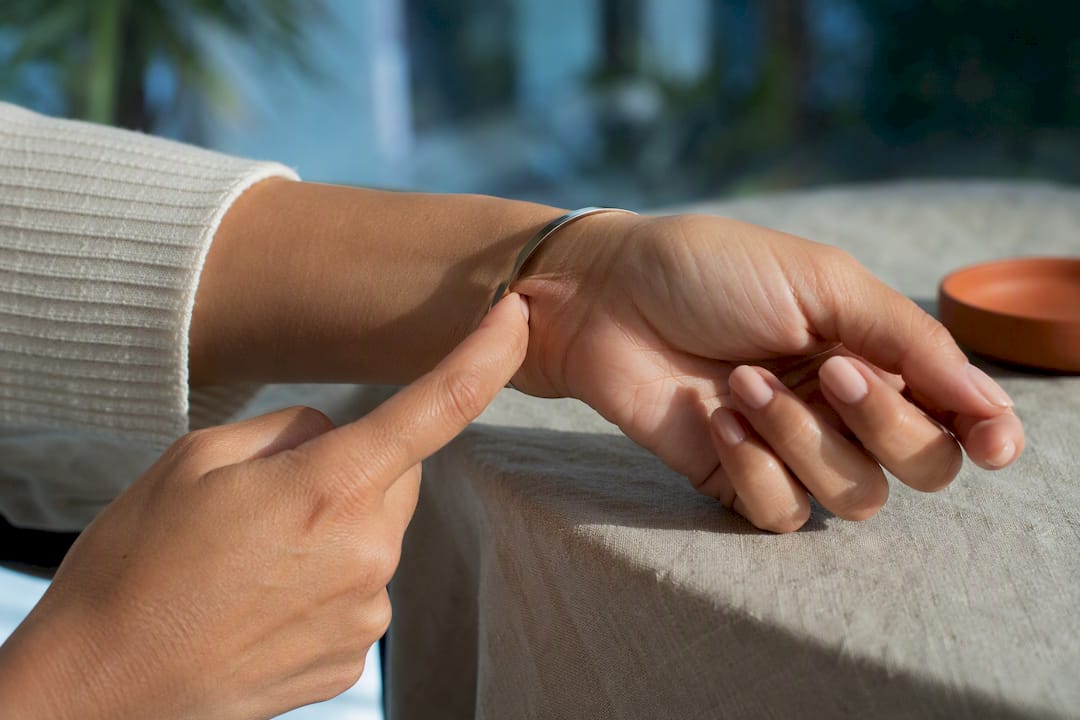
The bigger blind spot is gifting. Most guides assume you have the wearer’s wrist in front of you. You usually don’t. When buying for someone else, an adjustable or extender-equipped piece beats guessing every time, and it’s a better instinct than trying to sneak a measurement off their wrist while they’re not looking.
If there’s one piece of conventional wisdom worth pushing back on, it’s the obsession with exact-to-the-millimeter sizing. Comfort fit with a half-inch of built-in forgiveness serves most people better than a piece sized to the exact number on a chart. Prioritize the finger-test over the tape measure’s decimal point.
— Trinity
Find Bracelets Sized to Fit, Not Just to Guess
Sizing flexibility is built into many jewellery collections, so customers are not locked into one exact measurement guess. Many bracelet styles come with adjustable closures or multiple length options, which matters most when you’re buying for yourself and want room to size up for stacking, or buying as a gift and can’t get an exact wrist measurement in advance.
The Essential V Bracelet is a good example of a piece designed with this kind of flexibility in mind, easy to layer, easy to adjust, and forgiving if your measurement is slightly off. If a piece doesn’t sit right once it arrives, consider resizing or return options before assuming it’s the wrong choice permanently. Measure your wrist using the steps above, then browse the collection with your number in hand.
Where to Double-Check Your Measurement
For product-specific sizing, cross-reference your measurement against the retailer’s own printable guide or sizing PDF, since exact conversions can shift slightly between brands. The James Avery bracelet sizing guide and Citizen’s wrist-measuring tutorial are both solid references worth bookmarking.
Sources
- How to Measure Wrist Size: 10 Steps (with Pictures) - wikiHow
- How do I measure my wrist size? – Citizen Watch US
