

Ear stacking is a curated way to wear multiple earrings on one ear, arranged so the pieces work together instead of competing. The single rule that makes or breaks a stack: anchor a focal piece at the lobe, then graduate smaller pieces upward, keeping chunky statement pieces to about 40% of what’s visible. Everything else, from healing timelines to which studs to buy first, builds on that one proportion trick.
TL;DR:
- Most effective ear stacks follow the rule of anchoring a bold piece at the lower lobe and graduating smaller pieces upward, with chunky pieces occupying about 40% of visible space.
- Building a balanced stack begins with one statement piece, then adding decreasingly sized and shaped earrings, avoiding overly uniform or cluttered arrangements.
- Sensitive or cartilage piercings benefit from flat-back or labret posts, with healing times ranging from 6 to 12 weeks for lobes and up to 12 months for cartilage, requiring patience.
- Using materials like implant-grade titanium, sterling silver, or 14k gold ensures safe, durable wear, with solid gold or gold-filled pieces holding up longer for constant contact areas.
- When shopping, verify sizing, metal type, backing, and return policies, prioritizing everyday plated studs or solid gold pieces for lasting finish and comfort.
Table of Contents
- What Is a Curated Ear, and Why Does Composition Matter?
- How Do You Build a Balanced Ear Stack?
- Starter Ear-Stack Ideas to Try First
- Which Earring Types and Materials Work Best?
- How Long Does Healing Take Before You Add More Pieces?
- Where to Shop for Stackable Earrings
- A Note From Trinity on Designing for the Stack
- Sources
What Is a Curated Ear, and Why Does Composition Matter?
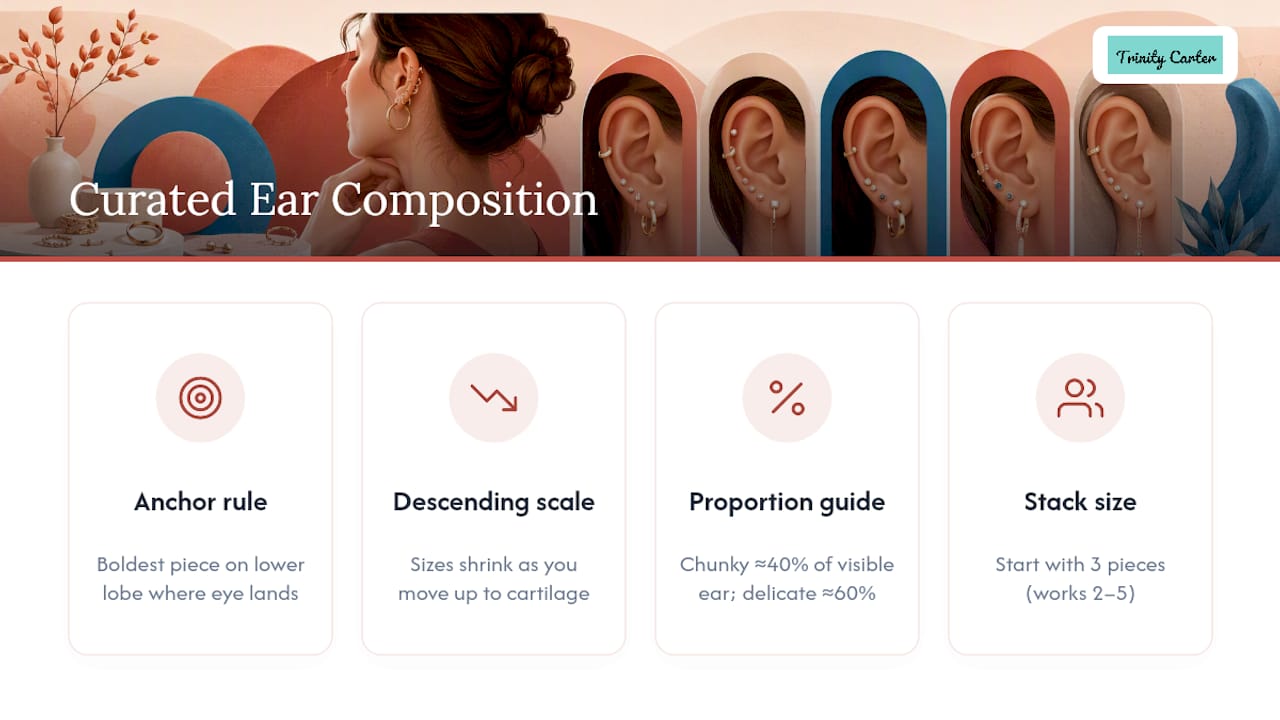
A curated ear isn’t just “more earrings.” It’s a planned arrangement where placement, scale, and metal choice work as one composition, the way a good necklace layer looks intentional instead of accidental. Piling on random pieces reads cluttered; curating the ear reads deliberate.
Three principles do most of the work. First, the anchor rule: your boldest piece sits at the lower lobe, where the eye naturally lands first. Second, descending scale: sizes shrink as you move up the ear toward the cartilage. Third, the proportion guideline stylists lean on constantly: chunky or statement pieces should fill roughly a minority portion of visible ear space, with delicate accents covering the rest. Most stacks that look effortless use three pieces per ear as a starting point, though two works fine and cartilage-heavy looks can stretch to five.
How Do You Build a Balanced Ear Stack?
Start with one piece, not five. That’s the advice stylists repeat most often, and it’s the one beginners skip.
Step 1: Pick your anchor. Choose a stud or small hoop for the first lobe piercing. This is the piece your eye returns to, so it should be the boldest thing you own but not overwhelming on its own.
Step 2: Graduate up. Add pieces that shrink in size as you move toward the top of the ear, and vary the shapes. A round stud, a bar, and a tiny hoop read as intentional; three identical studs read as a matched set that never quite becomes a stack.
Step 3: Cap the chunky pieces. Keep bold or textured pieces to about 40% of the look. Fill the rest with thin bands, small huggies, or plain posts.
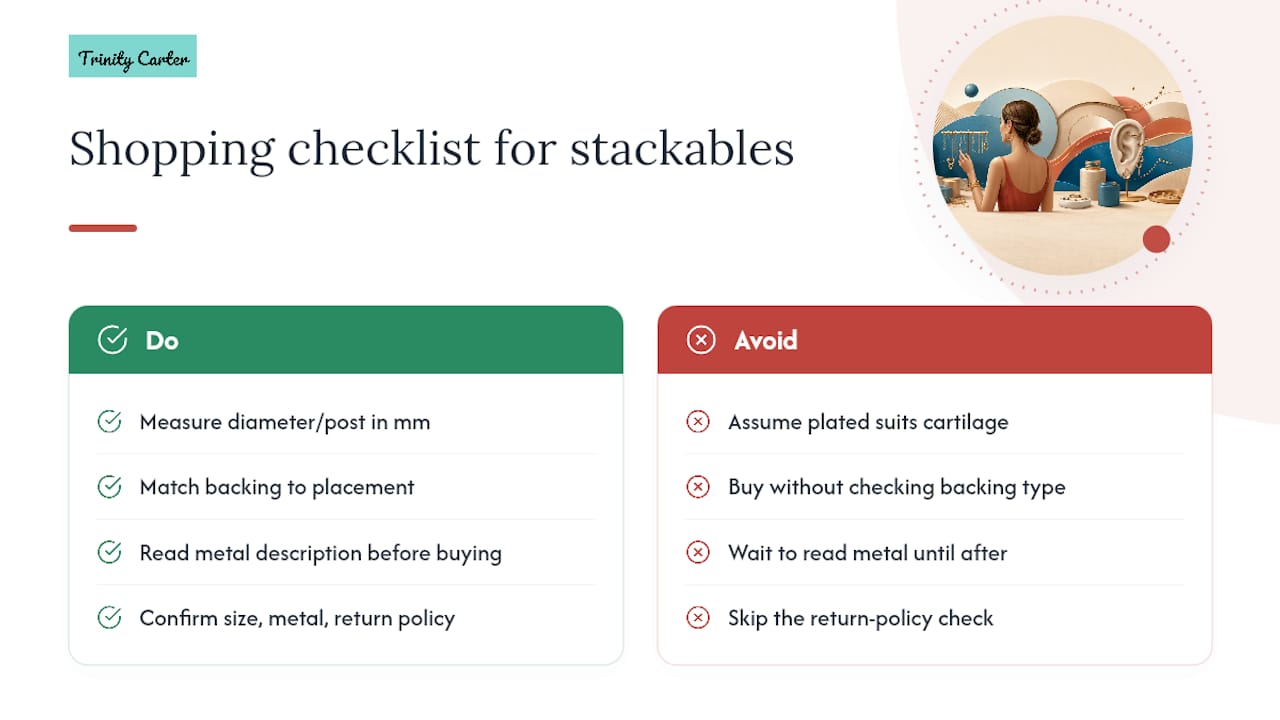
Before buying anything new, run through this checklist:
- Profile: does it sit close to the ear, or does it stick out awkwardly?
- Diameter or length: check the mm measurement, not just a photo
- Backing type: push-back for lobes, flat-back or labret post for cartilage
- Weight in grams, if listed, especially for anything going on cartilage
- Metal listed clearly, with hypoallergenic options flagged
Pro Tip: Try new pieces on before your final decision by pressing them gently against the ear in a mirror. If a hoop pokes your neck or a stud feels heavy after ten minutes, it will bother you every day you wear it.
Starter Ear-Stack Ideas to Try First
You don’t need six piercings to have a good stack. Here are five templates that work at almost any stage:
- Minimal everyday stack. Two or three small studs at the lobe plus a tiny hoop at the helix. Low commitment, easy to sleep in, works with every outfit.
- Balanced trio. Double lobe piercings paired with one helix or tragus piece. This is the classic triangle shape stylists point to as the easiest ratio to get right.
- Soft stacked lobe. Closely spaced lobe piercings filled with graduated studs, largest at the bottom, smallest near the top. Great if you’re not ready for cartilage yet.
- Statement conch centerpiece. A conch hoop or stud as the visual anchor, supported by one or two quiet lobe pieces so the conch doesn’t have to compete.
- Cartilage-focused stack. Helix, forward helix, or daith filled with small hoops or flat studs, usually three to five pieces total since cartilage naturally supports finer detail.
Symmetry isn’t required. Plenty of the best stacks are asymmetrical, heavier on one ear than the other, especially if you part your hair to one side or wear a lot of collared necklines. Let the side that shows more carry the bolder pieces.
Which Earring Types and Materials Work Best?
Not every earring style stacks well. Studs and huggies anchor easily at the lobe. Thin hoops and threaders add movement higher up. Flat-back labret studs and ear cuffs are the two most underrated tools for cartilage, since cuffs need no piercing at all and let you test a placement before committing.
Material matters just as much as shape:
- Implant-grade titanium and sterling silver are the safest bets for sensitive or new piercings
- 14k gold is durable and rarely irritates skin
- Gold-filled holds up far longer than gold-plated, which wears thin with daily contact
- Sticking to one metal palette when you start makes mixing easier later; if you do mix metals, use at least two pieces of each so neither looks accidental
For sizing, lobe studs typically run small and close to the ear, second-lobe pieces slightly smaller, and helix hoops in the tighter diameter range so they don’t catch on hair. Cartilage pieces should use flat-back or labret posts, since long standard posts push against the ear and cause pressure irritation that a flush-fitting post avoids. Take out dangling pieces before bed or the gym, and expect plated finishes to fade faster than solid gold with regular wear.
How Long Does Healing Take Before You Add More Pieces?
Lobe piercings typically heal in 6 to 12 weeks. Cartilage is a different story, ranging from 3 to 12 months depending on placement and your own healing pace, so always confirm timing with your piercer before adding a new piece nearby.
The biggest mistake people make is rushing. Most piercers recommend spacing new piercings out rather than getting multiple cartilage piercings in one sitting, since swelling in one spot can complicate healing in another. A stack built one or two pieces at a time over several months also tends to look more considered than one assembled in a single appointment.
Watch for:
- Redness or swelling that gets worse after the first week instead of better
- Discharge that isn’t clear, or a warm, tender bump forming around the piercing
- Jewelry that feels stuck or won’t rotate gently after the initial healing window
Clean new piercings with a saline rinse, avoid twisting the jewelry unnecessarily, and skip swimming pools until healed. If anything looks infected rather than just irritated, see a professional instead of waiting it out.
Where to Shop for Stackable Earrings
Run every purchase through the same short checklist: confirm the diameter or post length in millimeters, check the backing type against where it’s going (flat-back for cartilage, standard post for lobes), and read the metal description before you buy, not after.
Price tends to track material. Everyday plated studs sit at the lower end and work fine for lobe stacks you’ll swap often. Solid gold or gold-filled pieces cost more upfront but hold their finish through daily wear, which matters more for cartilage pieces you won’t be removing constantly.
Trinity Carter’s Essential V Earring Studs sit flush and close to the ear, which is exactly the profile you want for an anchor piece or a second-lobe accent. The Gold Essential V Earring Studs give you a way to keep one consistent metal tone across a whole stack, which stylists point to as the easiest way to make mismatched pieces look pulled together. And the Forever Love Heart Stud Earrings work well as a soft accent in a minimal or lobe-focused look, small enough to sit in the 60% “delicate” category without pulling focus from a bolder anchor piece elsewhere.
Before checkout, double check the size and metal listed on each product page, and confirm the return policy in case a piece doesn’t sit the way you pictured. For more everyday pairing ideas beyond the ear, Trinity Carter’s guide to ring stacking applies the same composition thinking to hands, and the piece on earring types for everyday wear is worth a read if you’re still deciding what to buy first.
A Note From Trinity on Designing for the Stack
Some designers create earrings assuming they won’t be worn alone. That means pieces that sit close to the ear, stay lightweight, and don’t fight for attention next to other studs.
If you’re just starting out, buy one strong anchor piece and build slowly from there rather than filling every gap at once. Comfort should never lose to style. A stack you can’t sleep in isn’t one you’ll wear for long.
— Trinity
Sources
- Curated ear ideas: stylish ways to build your perfect ear stack — PiercingMag
- How to stack your earrings and style piercings the right way, according to the experts — Hello!
- 22 ear-piercing stack ideas for every aesthetic — Byrdie
